The previous tutorial talked about making changes in the local repository and pushing them to the remote repository. This post will help us learn How to verify Committed Changes on Github at the remote repository.
If you are new to git, it is recommended that you first read the git push tutorial. This will help you understand the following instructions better. We have pushed our changes to Github (Remote repository). Let us see how we can verify those changes directly in Github.
Verify Committed Changes on GitHub
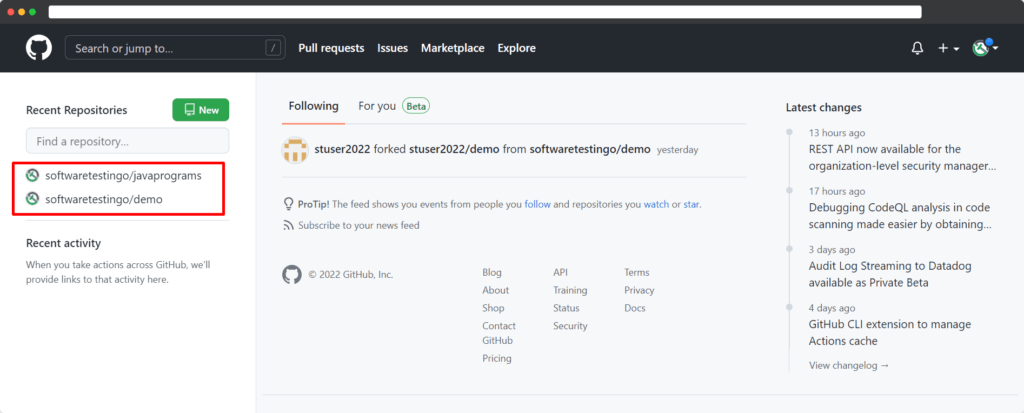
If you want to check the changes you made on GitHub, first sign in to your account. Then, navigate to the repository where you made the change. You can navigate to the repository by using the left-side panel.
After redirecting to the repository, you can notice two things. You can check the below image:
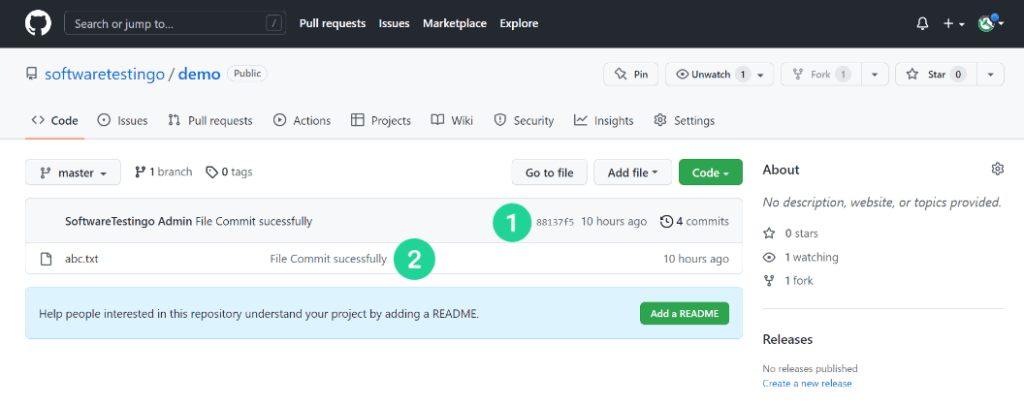
Time Of Commit: The latest commit is shown, which is helpful in identifying when the user pushed the changes. Also, it provides the hash value of the commit. If you go through the Git Log tutorial, you will become familiar with this process and will notice that this is the shorter version of the actual hash value. To validate this information, match the hash value you got in Git Bash while pushing the changes.
Commit Message: You can view the commit message on this page if you committed changes.
Suppose you want to Verify that your commit has been done or not. The very First thing you have to do is click on the commit count, and then it will display the entire commit history of that repository.
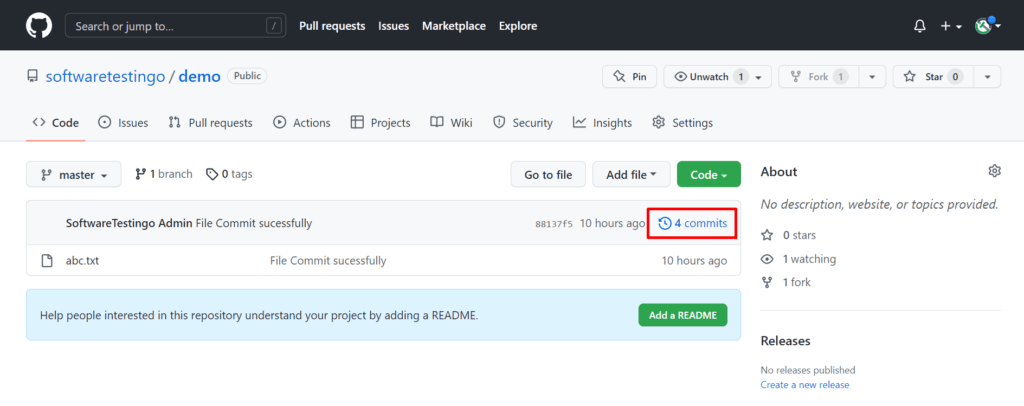
Clicking on the Commit Button will redirect you to the Commit History timeline view, where you can see all the commits and the respective details. Let’s explore the topmost commit block to learn more about it.
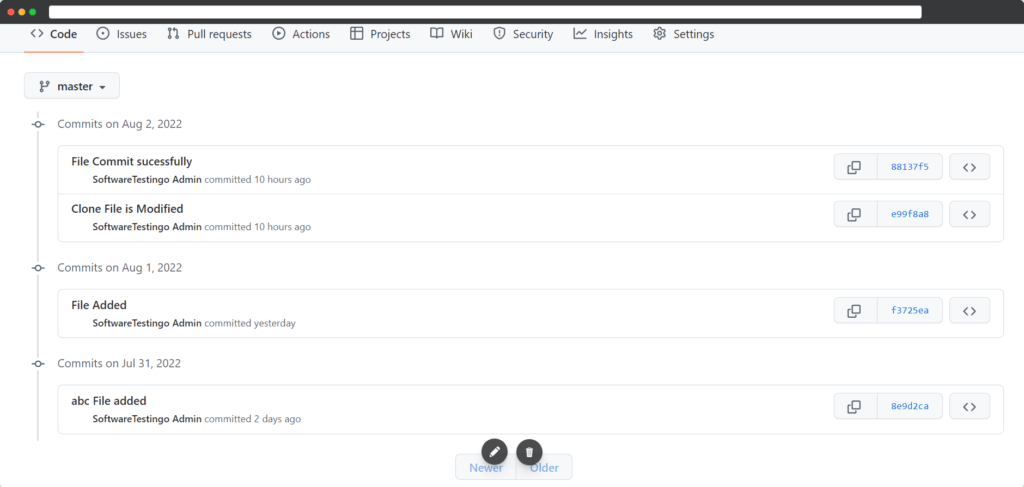
Let us go through the below image and find out the different information.
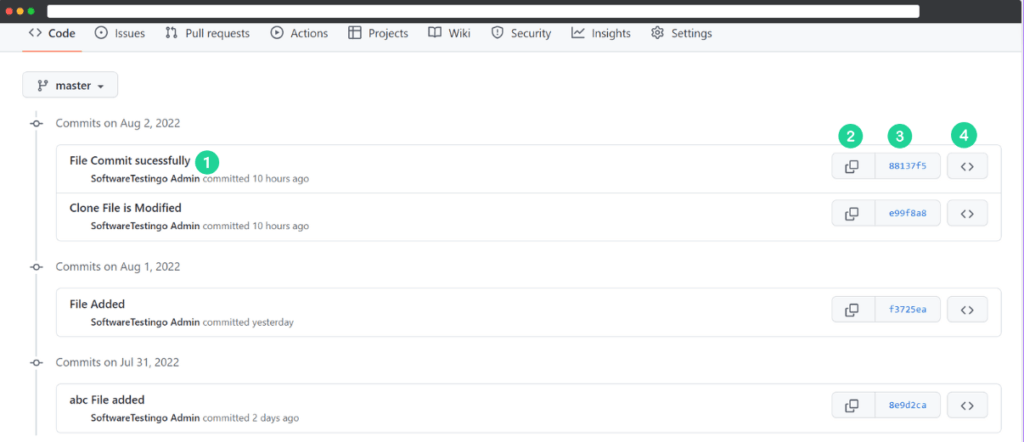
Commit Message: The headline of the block will be replaced with the commit message that the user used while committing changes in Git.
Copy Hash Value to Clipboard: This is the copy to the clipboard icon! In GitHub, when you press it, it copies the hash code of the commit onto your clipboard so you can easily paste it somewhere else.
Hash Code of the Commit: This block is all about the hash code of the commit – specifically, the compressed version of it. If you click on the hashcode, you’ll get an expanded form of the same code, and you can also see the file changes under the commit.
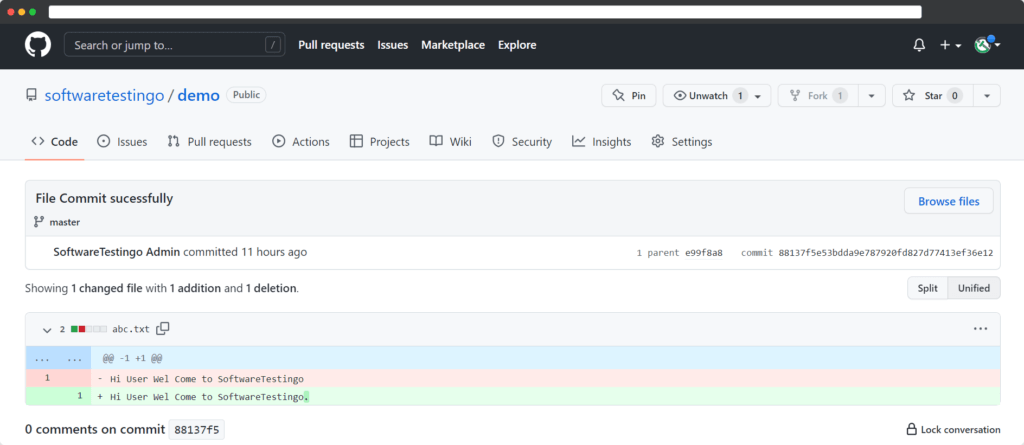
The changes that occur during the commit are shown on this page, with before and after versions. The pink line in the image above shows a deleted line, which is indicated by the (-) sign beside it. Similarly, added lines have a (+) sign next to them.
Check History: If you click on this button, it will show you the history of the repository up to that point in time. So, if we click this button on any previous commit blocks, only commits before that will be shown since they happened after that commit. The user will be able to see the state of the repository at that specific point in time.
