Set Java_Home Variable On Windows 10: In this post, we will learn how to set the JAVA_HOME variable on Windows 10. Before that, If you have not installed the latest versions of Java on your machine, you can check our blog post on how to install Java on Windows 10; then you can refer to this article.
After successfully installing Java on your local machine, you can follow up on this guide to set up the Java_Home Variable On Windows 10 system. If this variable is not configured properly, then when you run your Java program, you will get the errors.
So after installing the JDK on your machine, run the Java command java -version to know the installed Java version. If you are getting any errors, then follow the below steps.
Prerequisites For Set Java_Home
- Java Should Be Installed, and If Java is not installed on your system, then you can follow this post for Java 64-bit installation on a Windows 10 machine.
- Windows Should be Installed in Your System
If Java is not installed on your system, follow the steps below to configure the Java_Home so that we can run the Java command anywhere in our system.
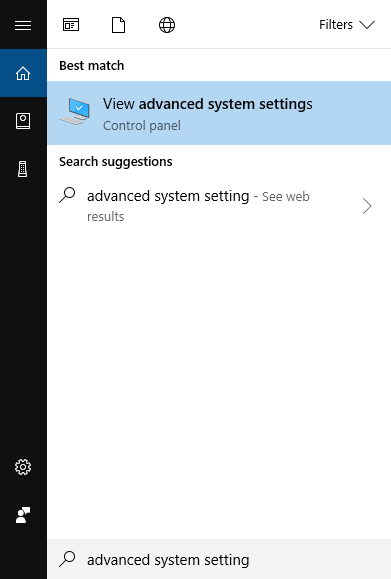
- First, we need to search advanced system settings in the search box and click on View Advanced System Settings.

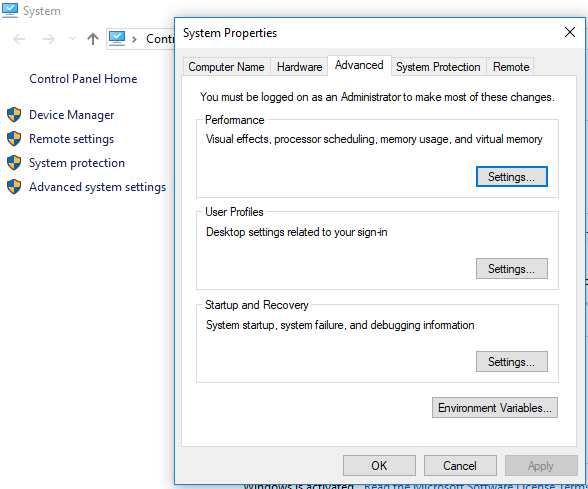
You will get a System Properties window after clicking View Advanced system settings.

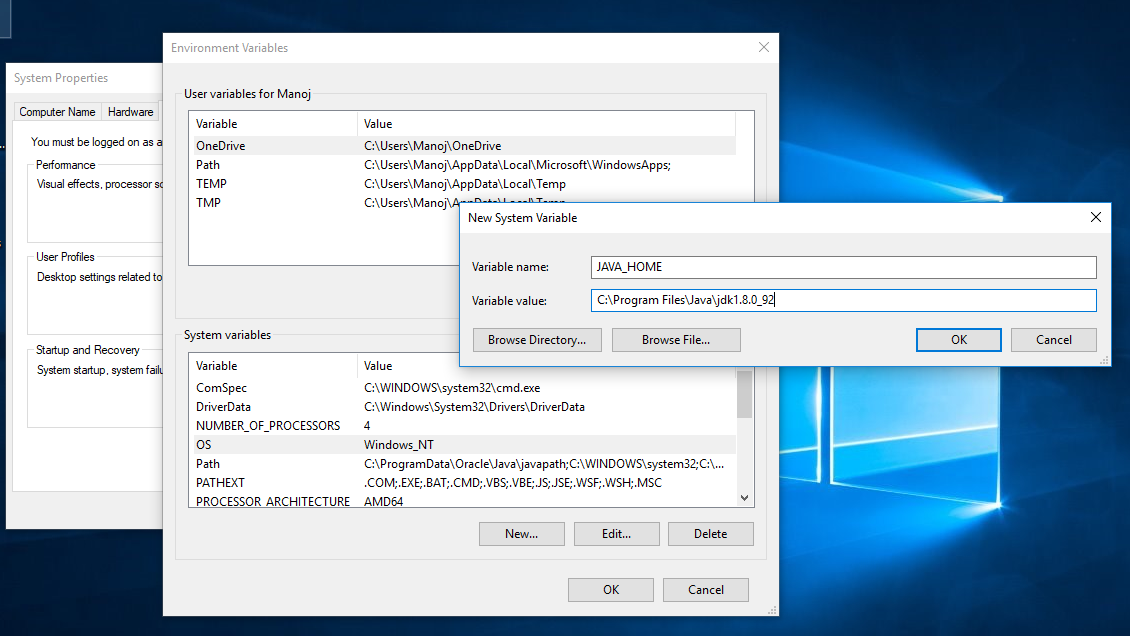
In System variables, add a new JAVA_HOME by clicking on New, and after that, enter the Variable Name as JAVA_HOME and Variable Name as C:\Program Files\Java\jdk1.8.0_92 to point into the JDK installation folder.

Note:
1. Correct: C:\Program Files\Java\jdk1.8.0_92
2. Wrong: C:\Program Files\Java\jdk1.8.0_92\bin
- After setting the JAVA_HOME in the system variable, you need to set the path in the Path variable. So, for an update, the path variable clicks on the path variable after the click on edit. After Clicking on the edit button, you will get another new window, “Edit Environment Variable”, and there you need to update the path details with \bin so that the complete path will look like this.
%JAVA_HOME%\bin
Verify Java Installed:
To verify whether Java is installed in your system, you need an open command prompt and try the below commands
For Verify Java Version:
Open the command prompt and enter java -version
C:\Users\******>java -version
java version "1.8.0_92"
Java(TM) SE Runtime Environment (build 1.8.0_92-b14)
Java HotSpot(TM) 64-Bit Server VM (build 25.92-b14, mixed mode)

C:\Users\****>javac -version
javac 1.8.0_92
To find out the Java installation directory details, try the below command
C:\Users\*****>echo %JAVA_HOME%
C:\Program Files\Java\jdk1.8.0_92
How do I set my Java_home?
We can set the Java_home by getting the environmental variables of the Windows machine and mentioning the Java installation directory.
What is the Java_home path?
Environment variables contain information such as drive, path, or file name. The JAVA_HOME environment variable points to the directory where the Java runtime environment (JRE) is installed on your computer.
Why should I set Java_home?
By setting the environment variable JAVA_HOME, you specify where the JRE and all those runtime resources will be found. You should ensure that the Java you execute matches the setting of JAVA_HOME.
