Installing Apache Maven on Windows and Mac: To use Maven for our project, we first need to install it on our computer. In this post, we’ll show you how to set up Maven on both Windows and Mac.
When we don’t use Maven, then building and managing a Java project is hard and takes a lot of time. Maven is a tool that helps manage Java projects easily. It uses something called the Project Object Model (POM) to download the things your project needs automatically.
| Post On: | Install Maven |
| Post Type: | Maven Tutorial |
| Published On: | www.softwaretestingo.com |
| Applicable For: | Freshers & Experience |
How to Install Maven on Windows?
Maven is great for building Java applications. It’s made in Java, so it works perfectly with programs that run on the Java Virtual Machine (JVM). But first, you need to have Java installed on your computer.
Prerequisites to Install Maven
Things You Need Before Installing Maven:
We have a blog post on how to install Java on Windows, which you can check out. To install Maven, you need to have the Java Development Kit (JDK) installed.
Notes: The latest version of Maven needs JDK 1.7 or above.
Why Do You Need JDK?
Maven is a tool made with Java, so you need Java to use it. Specifically, you need the Java Development Kit (JDK), not just the Java Runtime Environment (JRE). If you’re not sure about the difference, we have another post that explains it.
Install JDK For Windows
Oracle JDK costs money, but you can use OpenJDK for free. It works the same way, and you don’t need to worry about licenses.
After you install Java, you can check if it’s installed correctly by typing the Java -version in the command prompt.

Maven Setup For Windows
After configuring the Java on your Windows machine, you now need to install Maven on our machine. To install Maven on your machine, follow the steps below.
Different versions of Apache Maven are available on the official website. But before using those, you have to remember that different Apache Maven version requires a minimum JDK version to be installed on that machine.
Maven Download
1. Go to the Maven download page and find the version you want to install. The latest versions are in the Files section, and older ones are in Previous Releases.
2. Click on the link to download the binary zip archive for the version you want. For example, you might download Maven 3.8.6.
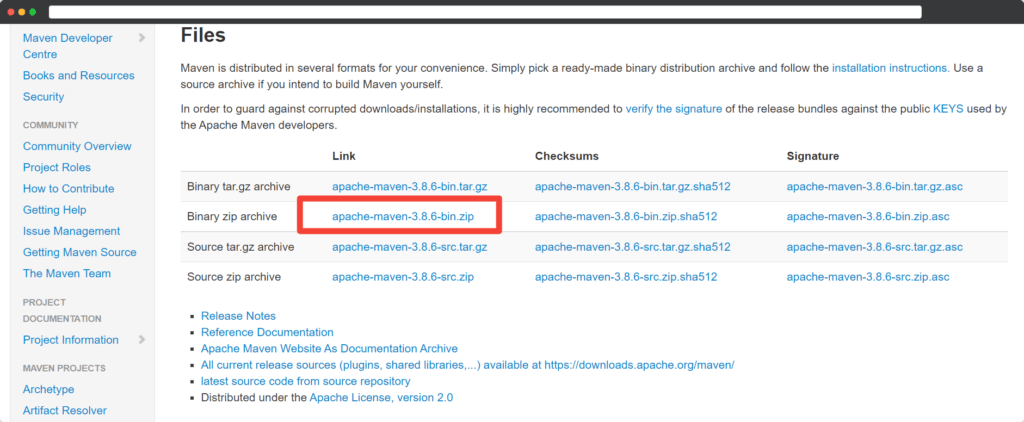
3. After downloading, extract the zip file to a folder. There’s no need for a complicated installation process. For example, you might extract it to any location: C:\Users\XX\Downloads\DL_Files\apache-maven-3.8.6.
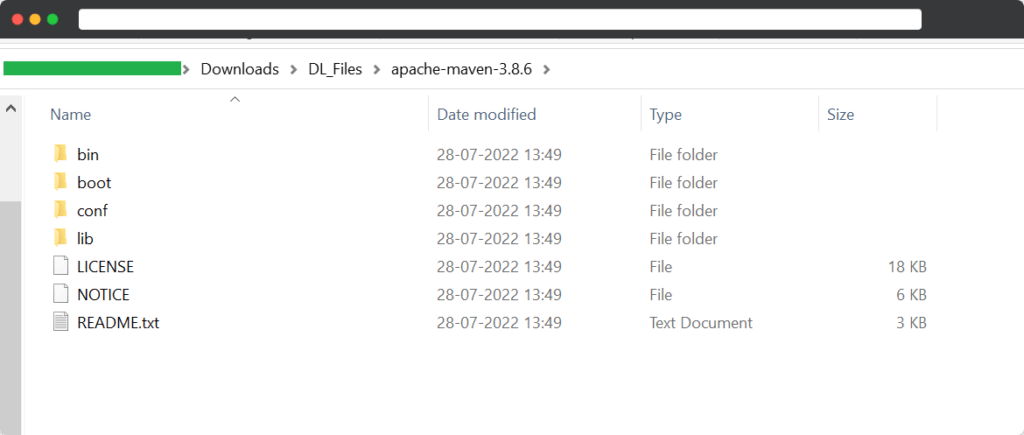
Setting up Maven Environment Variables
After downloading Maven, you need to set up some environment variables. So follow the below steps to configure the M2_HOME, MAVEN_HOME Path.
- Search for “environment variables” in the Windows search bar.
- Click on “Edit the system environment variables.”
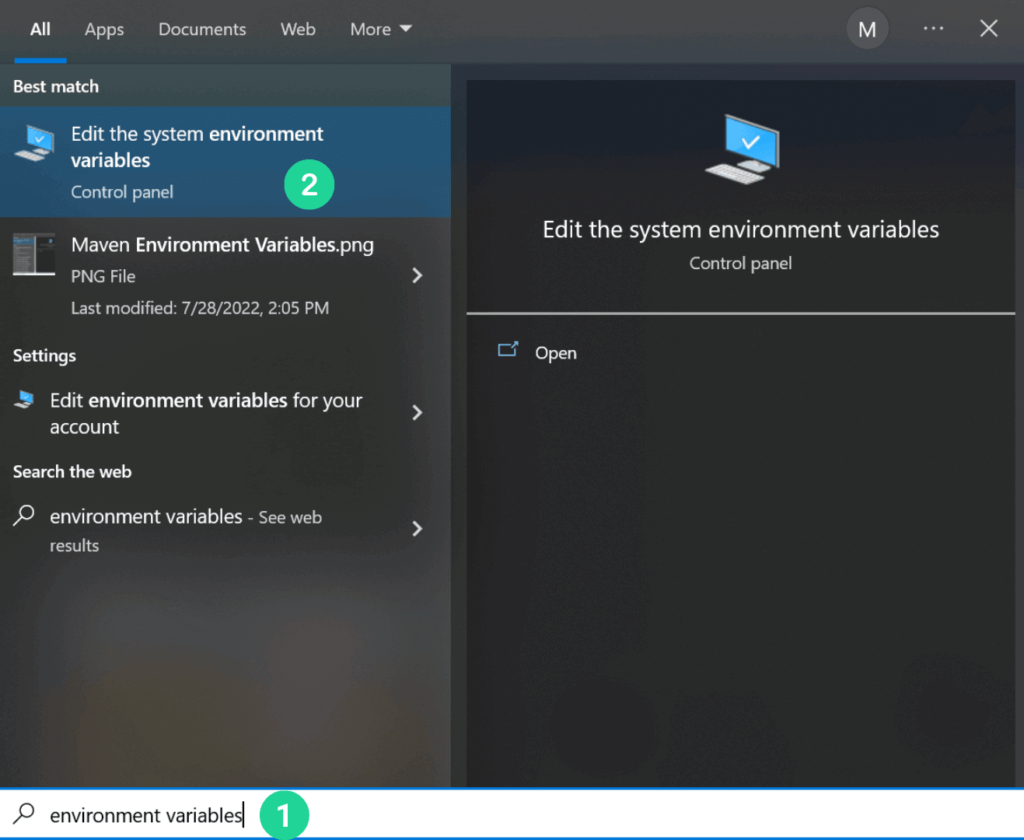
After clicking on Edit the system environment variables, you will get a window System properties.
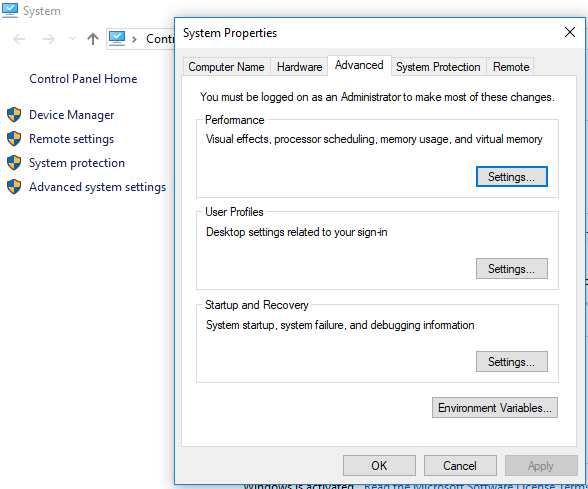
Click on the Environment Variables, After that you will get another environment variables window. Click the New button under the System Variables section to add a new system environment variable.
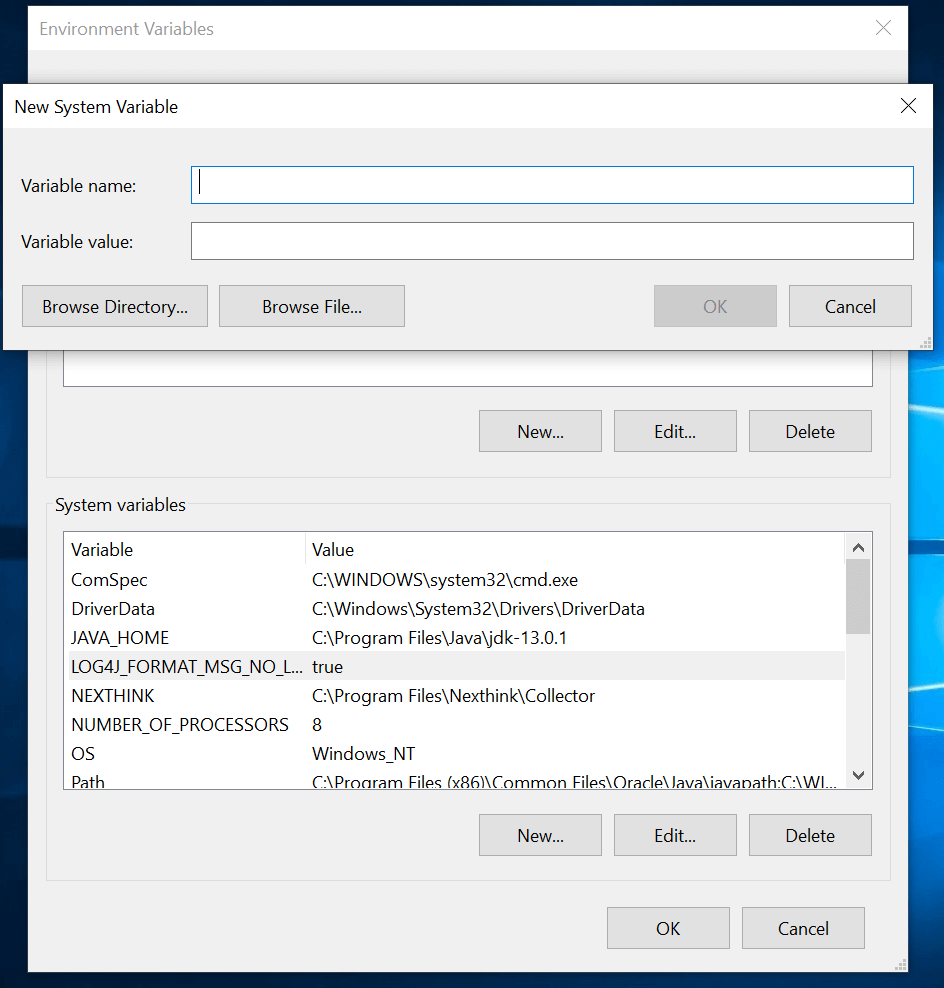
In order to set up Maven, you’ll need to add its home directory to your system variables. To do this, simply enter MAVEN_HOME as the variable name and the path to the Maven folder as the variable value. This will help ensure things run smoothly. Click OK to save the new system variable.

The next thing to do is click on the “Path” variable under the “System variables” section in the Environment Variables window. Clicking on the “Edit” button will allow you to edit the variable.
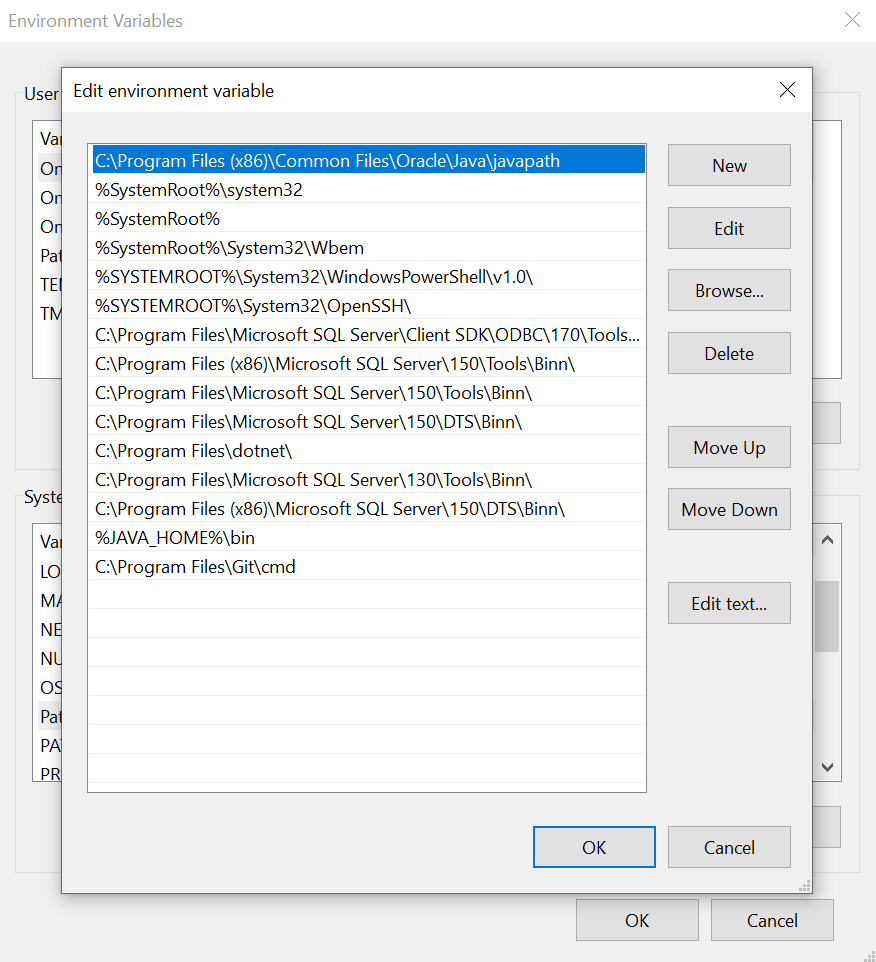
Click the New button in the Edit environment variable window. Enter %MAVEN_HOME%\bin into the new field. Click OK to save changes to your Path variable.
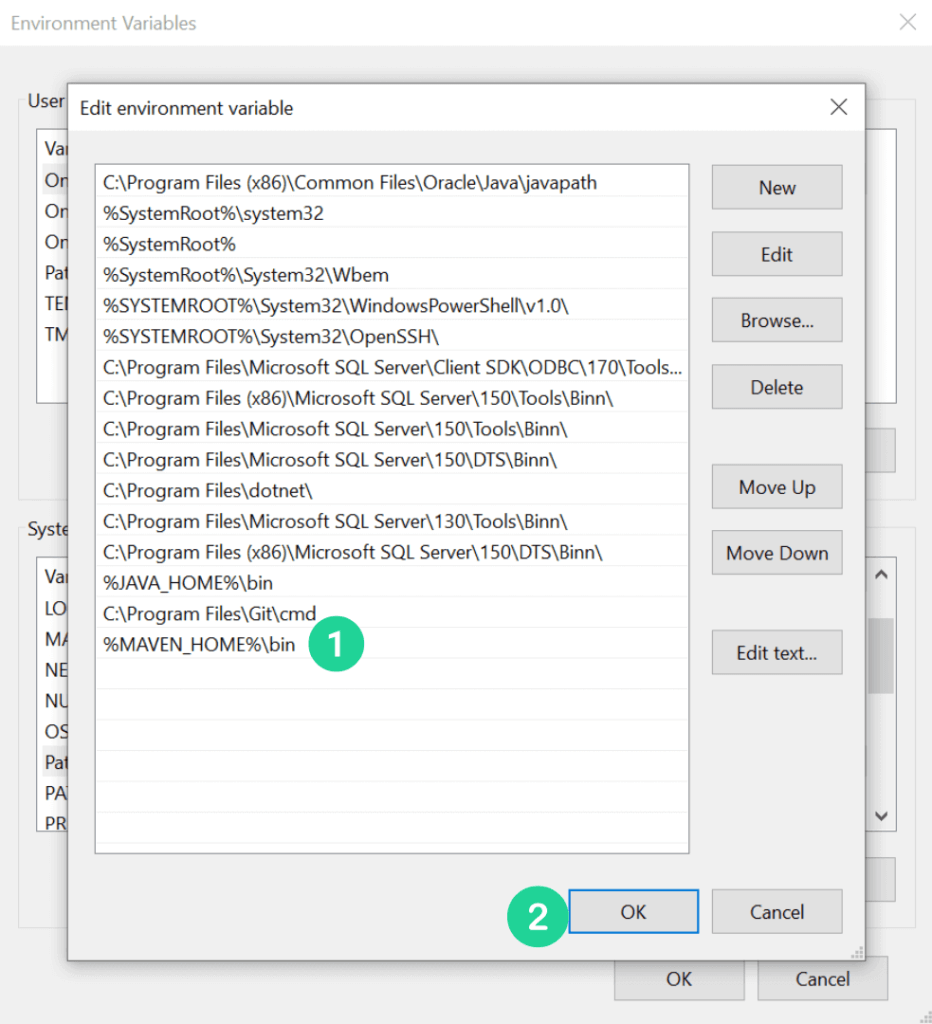
Notes: If you see the error ‘mvn’ is not recognized as an internal or external command, operable program, or batch file, it may be because you have not added the path to the Maven home directory to your Path variable.
Again, Click the “OK” button in the “Environment Variables” window to save your changes.
Maven Verify Command
To check if Maven is installed correctly, open the command prompt and type: mvn -version. If you see the Maven version, your installation is successful.
If the above command gives you the Maven version, it means that your environment variable is set correctly and the Maven installation is successful.

Conclusion:
Now you know how to install Maven on your Windows computer! Maven is a great tool that makes managing Java projects easier. Just follow the steps to set it up, and you’ll be ready to use it in no time. If you found this guide helpful, please share it with others who might need it. Let’s help everyone get started with Maven!

