If you’re just getting started with Git, understanding the Git commit command is essential. Committing your work is the whole reason for using a versioning tool, so it’s important to know what a commit is and how to use the command.
This post will outline everything you need to know about git commit. We’ll explain its many uses, specialized options, and when you should use it.
If you don’t have Git installed on your system, download and install it. You will also need some familiarity with the command line for this post.
| Post On: | Git Commit |
| Post Type: | GIT Tutorial |
| Published On: | www.softwaretestingo.com |
| Applicable For: | Freshers & Experience |
| Get Updates: | Join Our Telegram Group |
Let’s get started. Before you can commit changes in Git, you first have to add those changes to the staging area. A staging area is a temporary place for new or modified files you want to include in your next commit.
Prerequisite
Before learning how Git commits work, there is some prerequisite:
- How to Create a Repository?
- Navigating to another directory through Git Bash?
- How to use the Git Status command?
- How do you use the Git add command?
- How to Use Remove command?
Now, in this tutorial, we are going to learn about:
- How do you create a file in Git?
- How to add the file to the staging area?
- How are you Committing the changes in Git?
- How do you commit the changes in Git without a commit message?
Git Commit Fundamentals
We must all be on the same page with some of the basics related to the git commit command.
What Is a Git Commit?
In Git, “commit” can be used as a verb or a noun. When you make changes to your project, you “commit” those changes. This creates a new commit, basically just a snapshot of your project.
A commit, or “safe point,” is a saved milestone in the history of a project. Each commit has an identifier, so you can go back and view it later if needed. Each commit also references one or more parents, except the first commit, the root commit. The revision history of the repository can be seen by viewing all past commits and their relationships to one another.
How Do I Commit a File in Git?
It’s time to get down to business and learn how to commit changes in Git.
How to Create a Directory Using GitBash
To create a directory using Gitbash, you can use the mkdir command below:
mkdir <directory name>
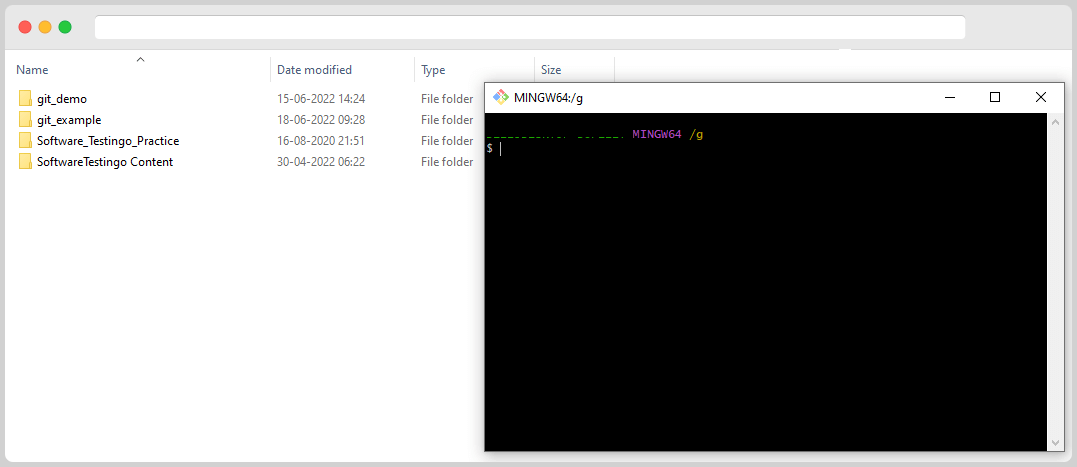
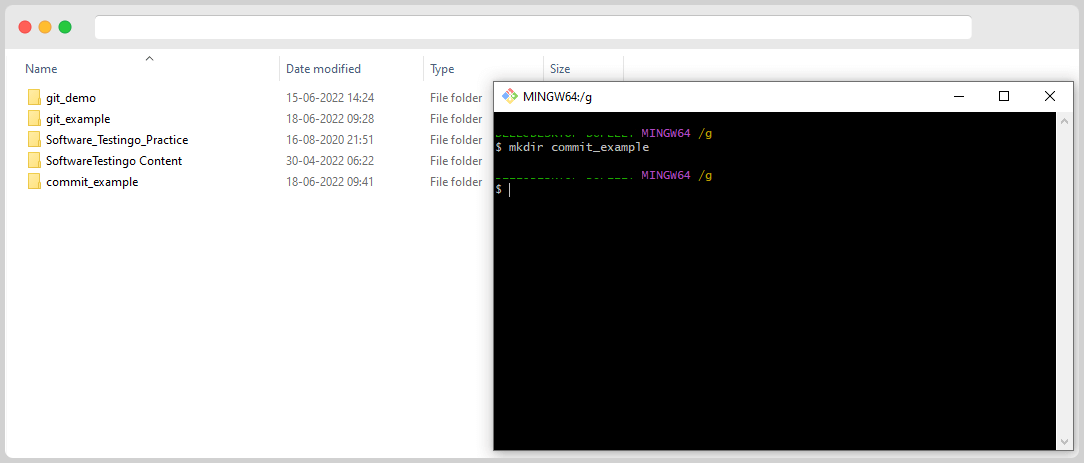
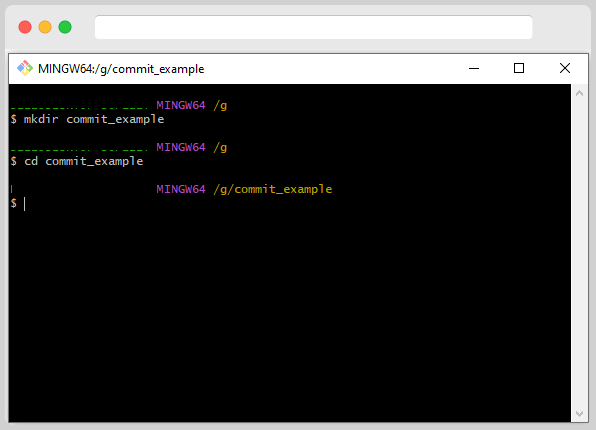
Now, let’s Switch to That created directory; in our case, the directory name is “commit_example.”
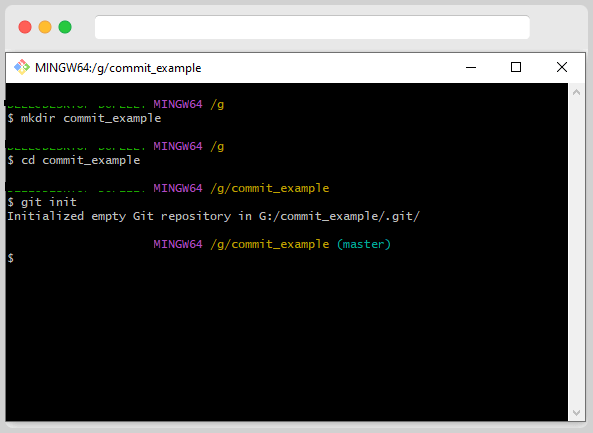
After switching to the working directory, we need to convert that directory to the repository to execute the command there.
How to Create a file using Git Bash
To create a file through Git Bash, you must create a repository and navigate to this directory as your working directory. Once you are in the correct repository, type the following command:
touch <filename with extension>
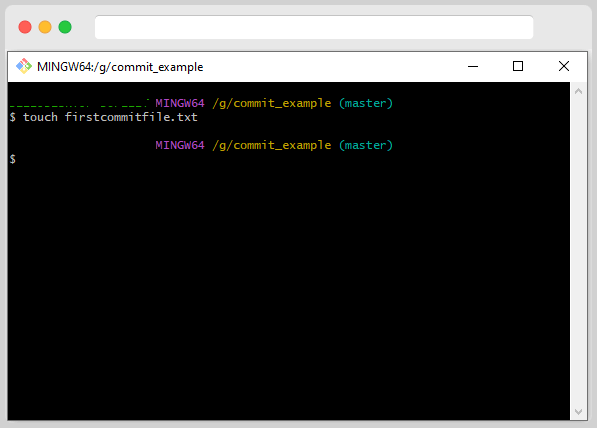
After creating the empty file, let us try to write something inside the file. So, you can use the below commands for writing into the file.
echo "Your Message" > filename with extension
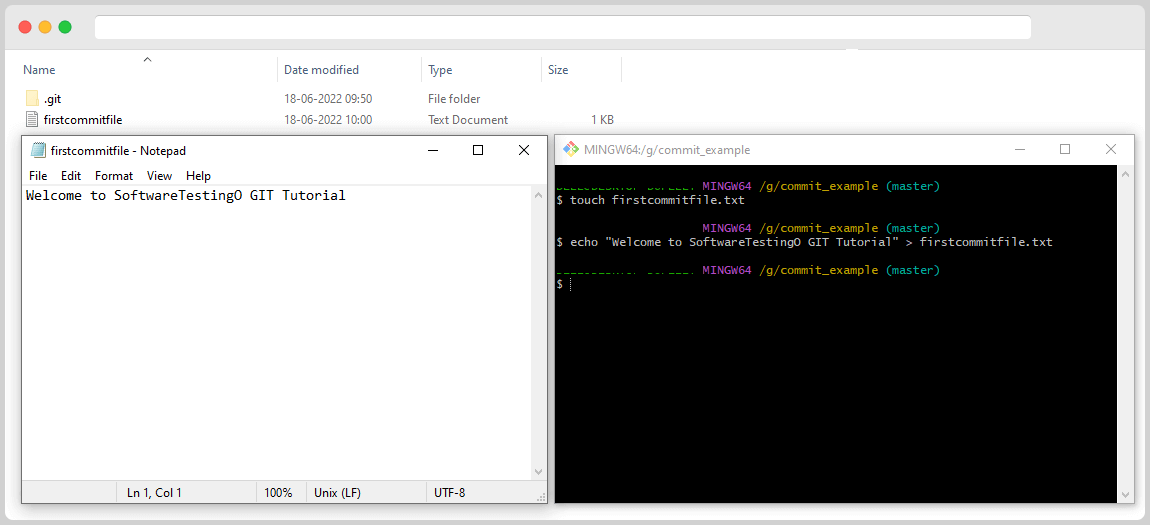
Let’s try to commit the changes we made to the file. First, we need to add the file to the staging area. Our previous blog posts taught us that this is necessary before committing changes.
How to add the file to the staging area?
We must be in the staging area to commit changes. Let’s see what happens when we try to commit without adding the file to the staging area first. Type the following command:
git commit
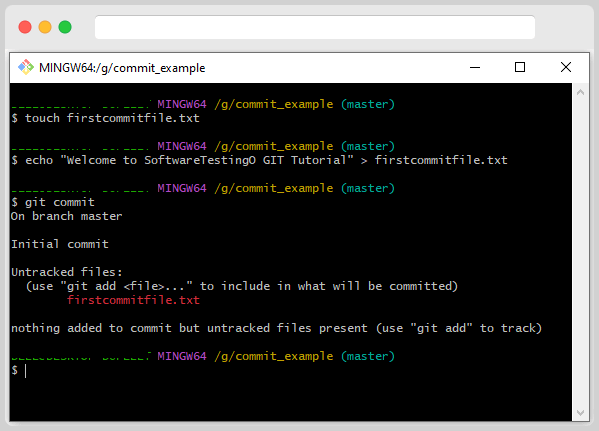
The “commit” command is used to save changes. However, if you try to commit and Git says there are no changes to save, that’s because there are no files in the “staging area.” To save a file’s changes when using Git, the file must first be in the staging area. You can use the below command to add the files to the staging area.
git add <filename>
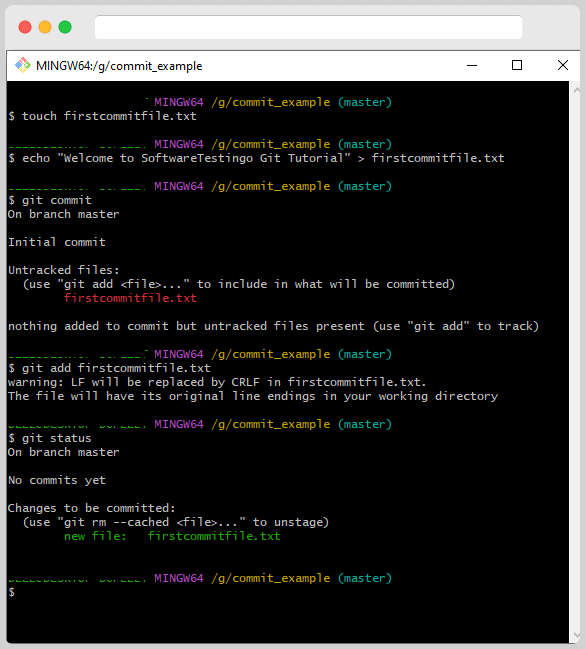
How do you commit a file in Git?
Although the commit process is vast, and we can’t discuss all of it in one tutorial, we’ll slowly cover it more in future tutorials. Now, know that committing your changes is a simple command in Git. To commit in Git, we need to enter the following command:
git commit -m "This is my first commit"
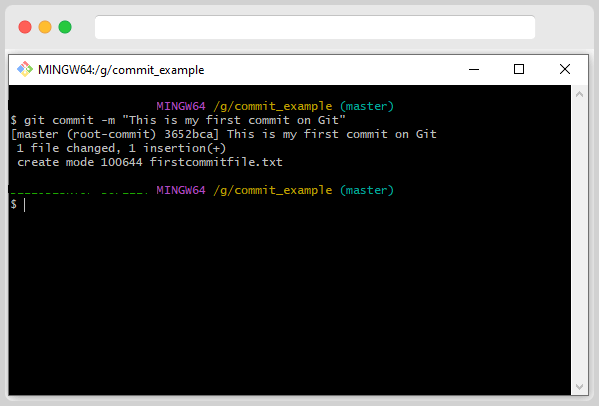
After executing this command, you notice the file got committed with the message “This is my first commit on Git.” In the above case, we have written the message in GitBash only. Now let us see how we can do Git commit with the default editor, which we mentioned during the installation.
If you forget to add the -m flag when writing your commit message, don’t worry! You can still commit by writing the commit message in the text editor. Open up Notepad++ (or whatever text editor you use for git bash) and write your commit message there.
Note: During Our Git Installation, we have set the Noptepad++ as the default editor.
Git commit
On entering the above command, it will open the configured default editor :
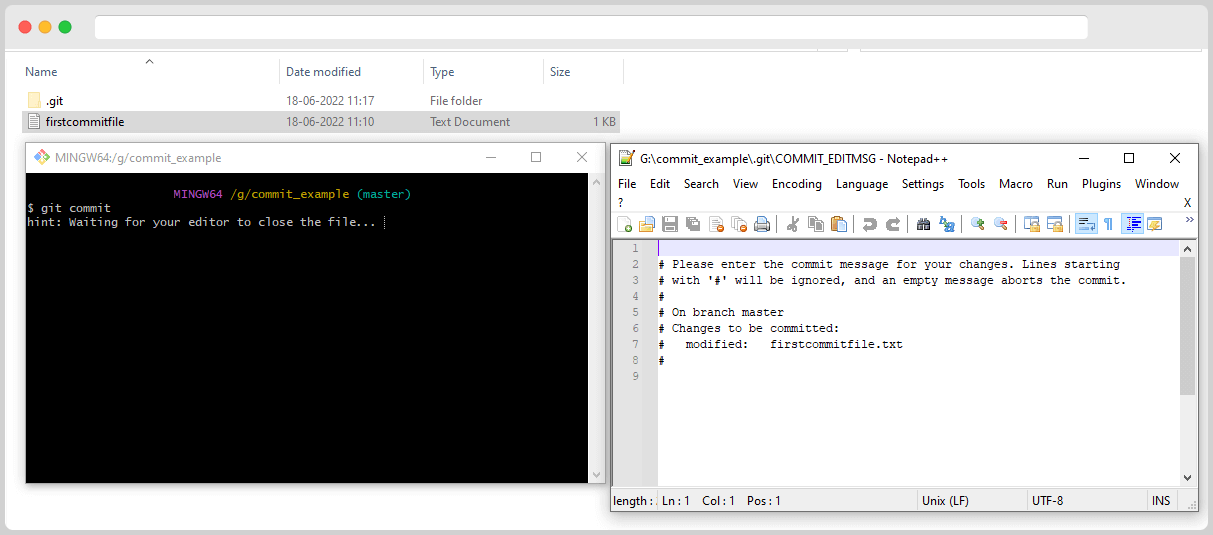
You can enter the commit message on that editor
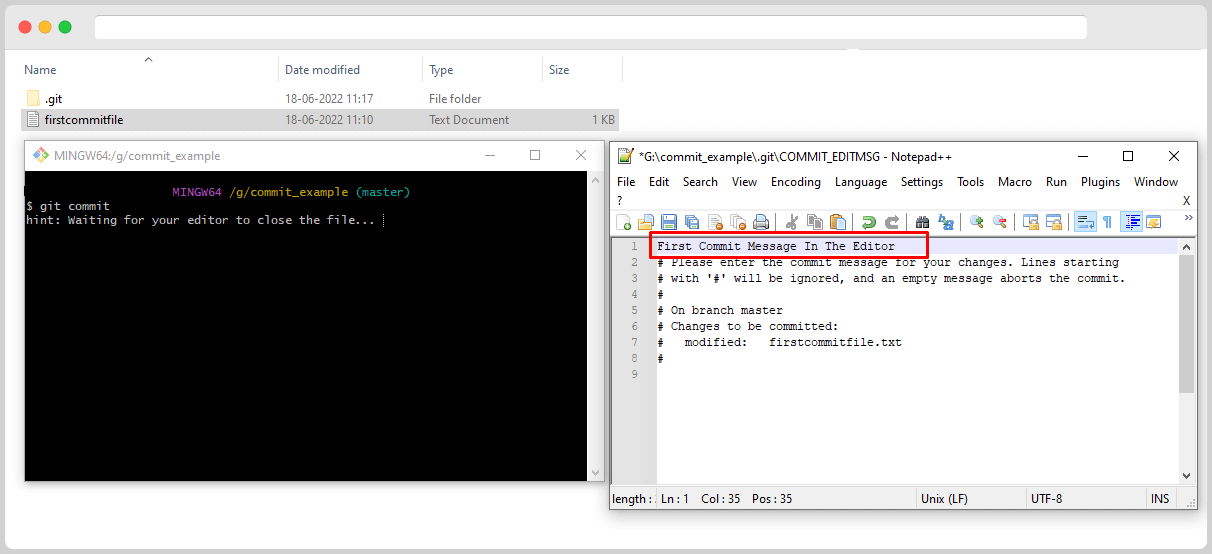
After Writing the commit message, you can press ctrl+s to save the commit message and close the editor. On Closing the editor, the changes will commit with the commit messages.
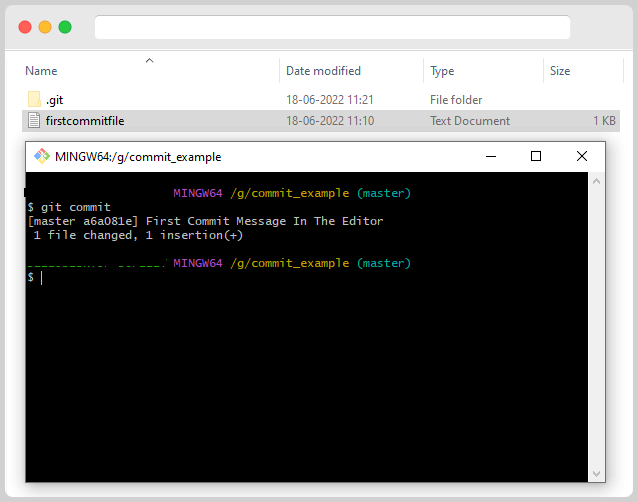
Earlier in this post, we have performed the commit operation in 2 ways:
- With the help of the Gitbash
- With the help of the Git editor, which is configured during the installation
But, in those sections, we tried to commit when there were some changes to commit. What if there aren’t any? For that first commit, all the changes in Git should be made with the proper commit command and message. Once that is done, type the following command:
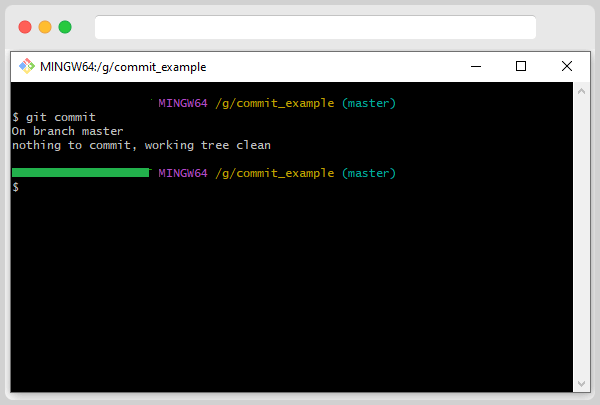
If you have nothing to commit, the terminal will tell you there is nothing to commit without opening the text editor. However, if your text editor opens after running the command, it means there is something to commit.
What is a Commit Message?
Please make sure that each Git commit has an associated commit message. The goal of the message is to explain the reason behind the change. This will help us understand your code changes better.
You can make your Git commit messages just a single line or include a summary followed by a more detailed body – it all depends on the change. It’s also common to add metadata like issue IDs from project management, or bug-tracking software is also expected and helpful to include.
What’s a Good Git Commit Message?
A good commitment message is essential so that others can understand your change and why it matters. A detailed explanation of how the change was made is unnecessary since they can see the difference in code.
A well-written commit message will help explain what the change is and why it matters. It’s unnecessary to include details about how the change was made since we can easily see that difference.
- The message should be in the imperative mode (so, “Add button” instead of “Added button”).
- A blank line should separate messages that need a separate body.
- The subject line should be limited to 50 characters.
Why do we need to have commit messages?
Do not commit without a message, as Git does not recommend this. Commit messages are used to track the changes made during a particular commit, so it becomes difficult to know what has been changed if there is no message. This makes it hard to debug and fix issues later on.
You can still commit without a message in Git, although it’s not recommended. To do so, follow these steps with a slight change to the previous command.
Create a new file (touch command) and write something into the file using the echo command.
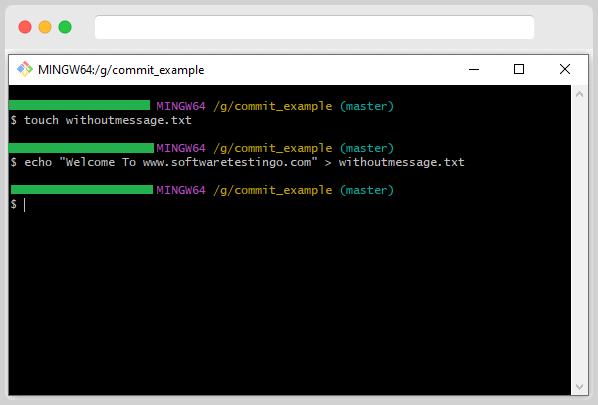
Add the file to the staging area.
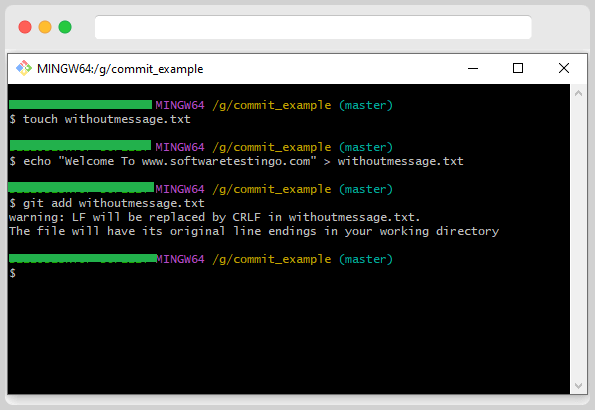
We will try to execute the command for the commit, but this time, there is a slight difference compared to the previous command. Because this time, we want to commit without any message. So, to do the Git commit, execute the below command.
git commit -a –allow-empty-message -m ‘ ‘
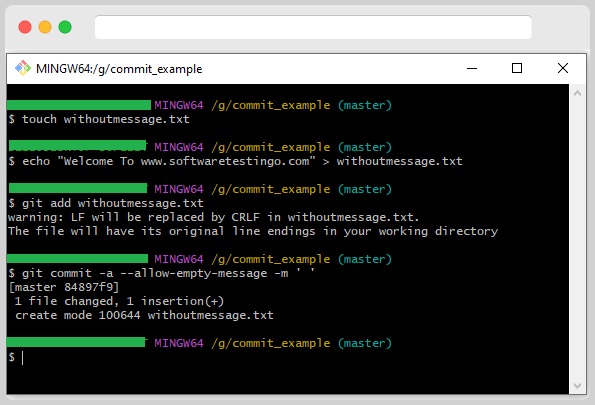
If you want to commit your changes in Git without a commit message, you can do it this way. However, it is not recommended.
Committing Changes to Existing Files
Most of the time, when you’re using Git, you will commit changes to existing files rather than creating new ones.
For this, we can use the same Git add command, which can be used in multiple ways. For this example, we can create a file and commit the file.
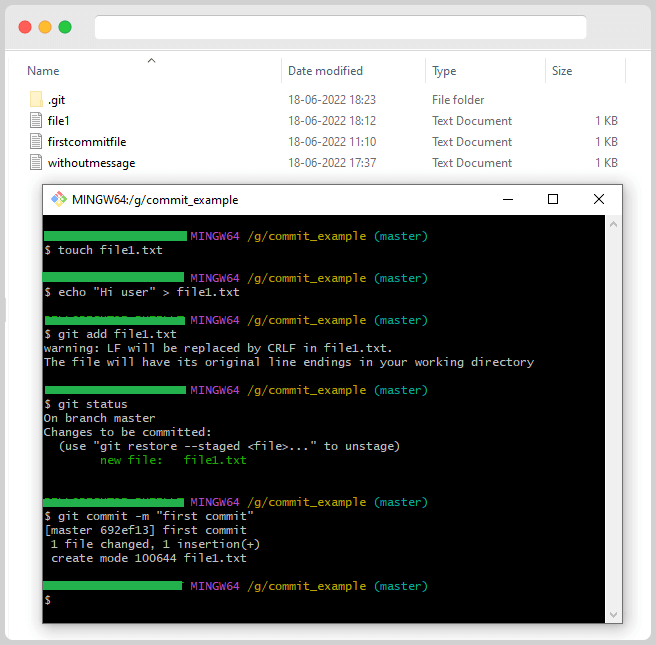
After that, we will add some content, and again, we will commit the file.
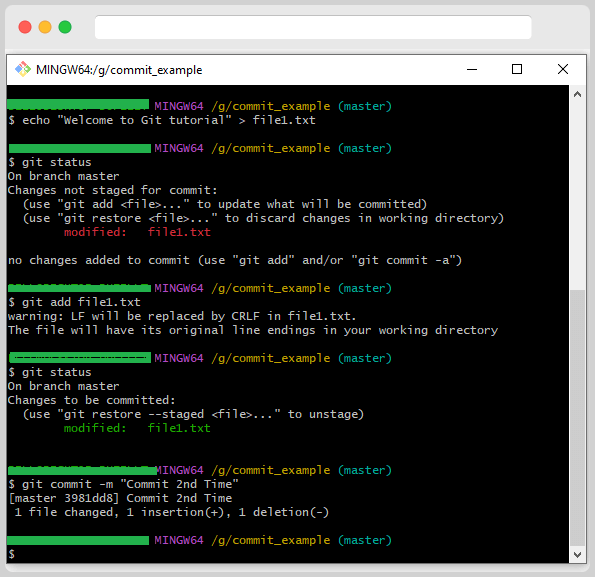
Committing Multiple Changes in One Go
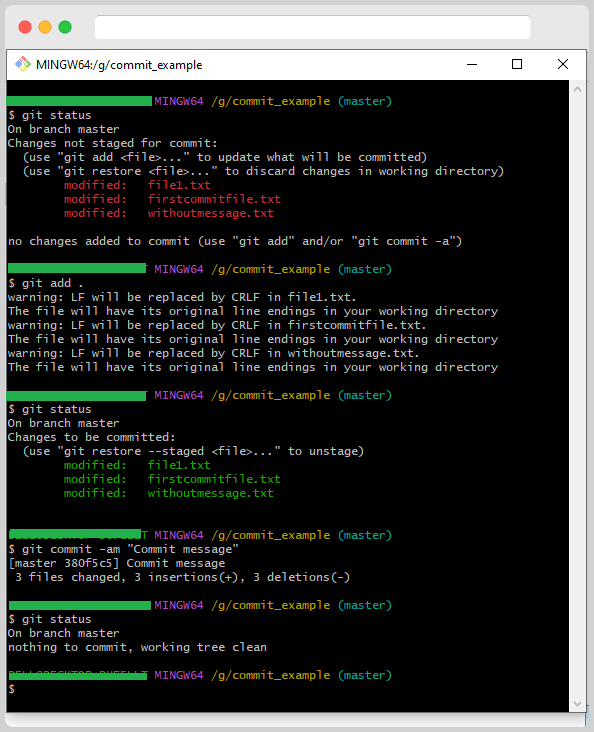
If your repository has multiple changes and wants to commit all of them, you can use Git Add to include all current changes into the next commit – no need to add files one by one.
You can bypass the Git add step entirely by using the -a option when committing, which will commit all changes.
You Can add multiple files by using Git Add. But this time, we tried to commit multiple files in a single commit statement.
A repository with several changed files
git add.
git commit -m “Commit message”
The commands above are equivalent to the following one
git commit -a -m “Commit message”
Yet another option
git commit -am “Commit message”
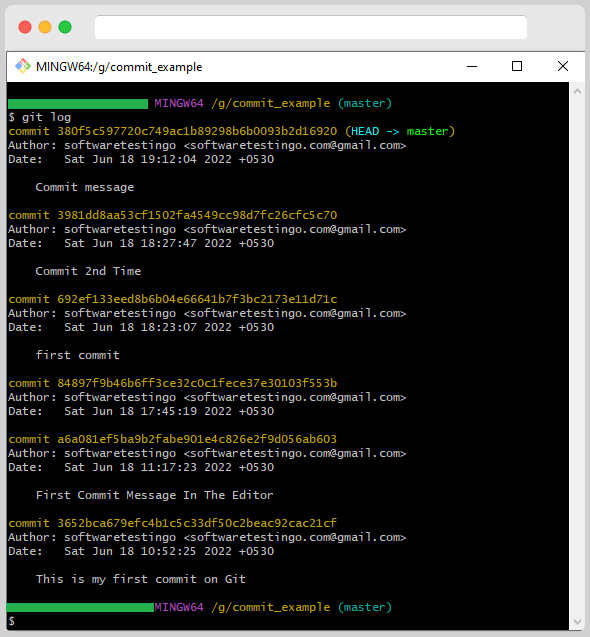
At any time, you can use the git log command to see your commit history.
I Made a Mistake: What Now?
Commits cannot be changed once made, but if you make a mistake, some commands allow you to appear to change commits. These create new commits and abandon the old ones. I will use phrases such as “change” or “delete” commits to keep things simple, but remember that this is a simplification.
Amending a Commit to Change Its Message
Let us take an example of a Type error when you are trying to commit.
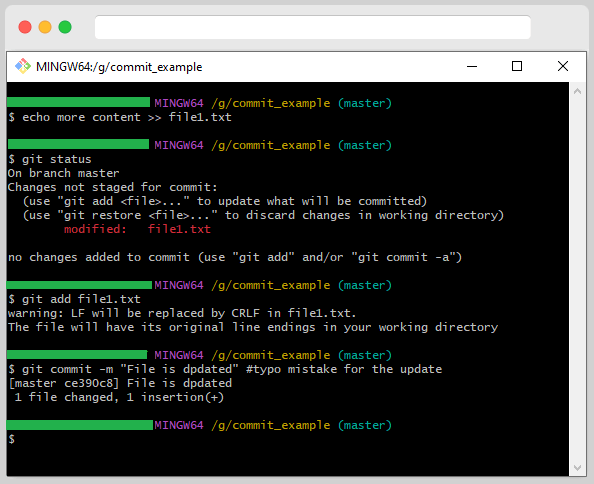
These are minimal changes, so its fix is easy. To change your most recent commit, you can run the git commit –amend command. This will allow you to make any other changes to the repository before committing them.
On executing the git commit –amend command, it will open the configured editor, and you’ll be able to fix the commit message. After fixing the message, you can save the editor, and then you can close the editor.
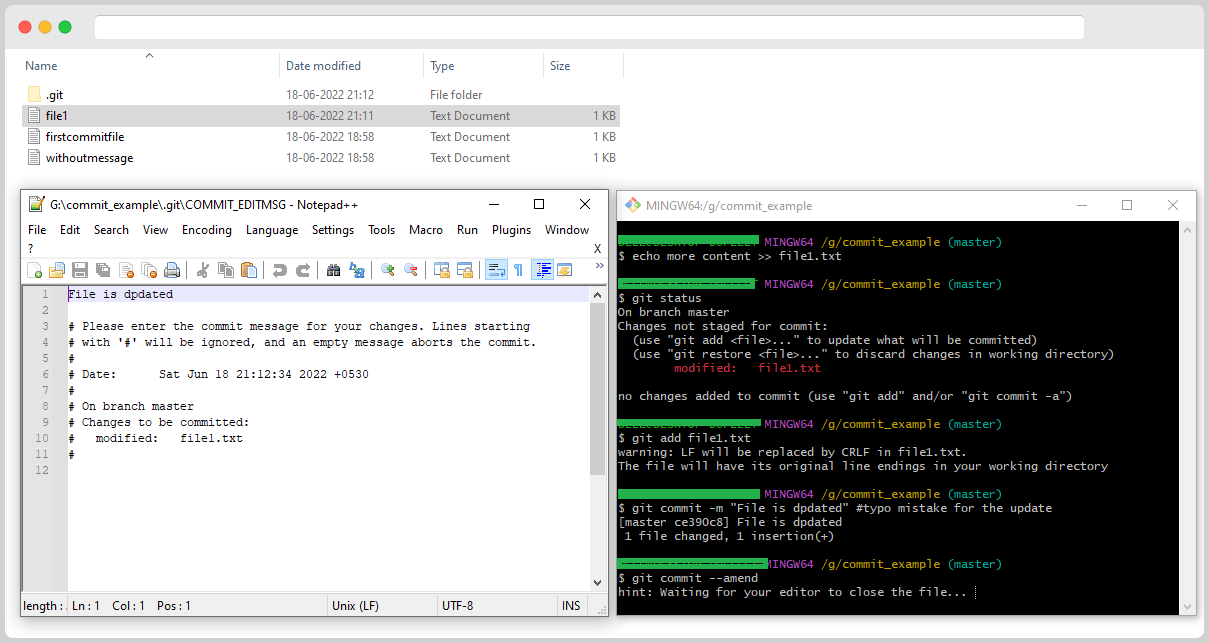
Amending a Commit to Include More Changes
If you forget to include changes in a commit, you can use git commit –amend.
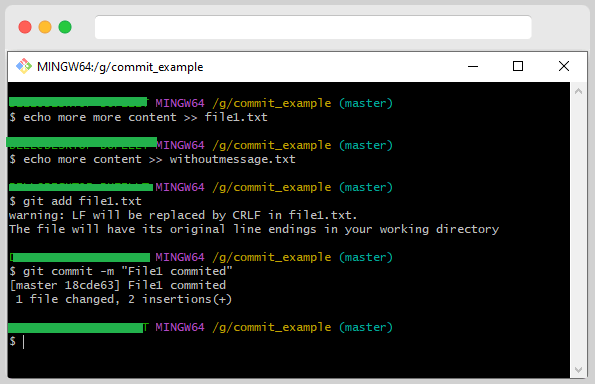
After committing, you realize that some other files need to be committed. You need to add the missed file into the stage area for this.
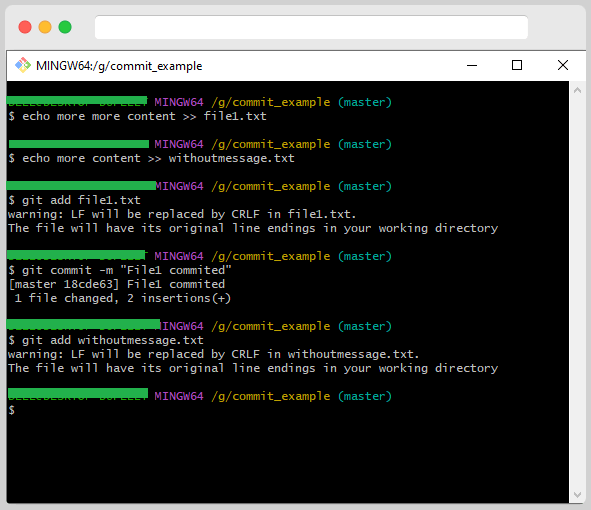
Then, you run git commit –amend again:
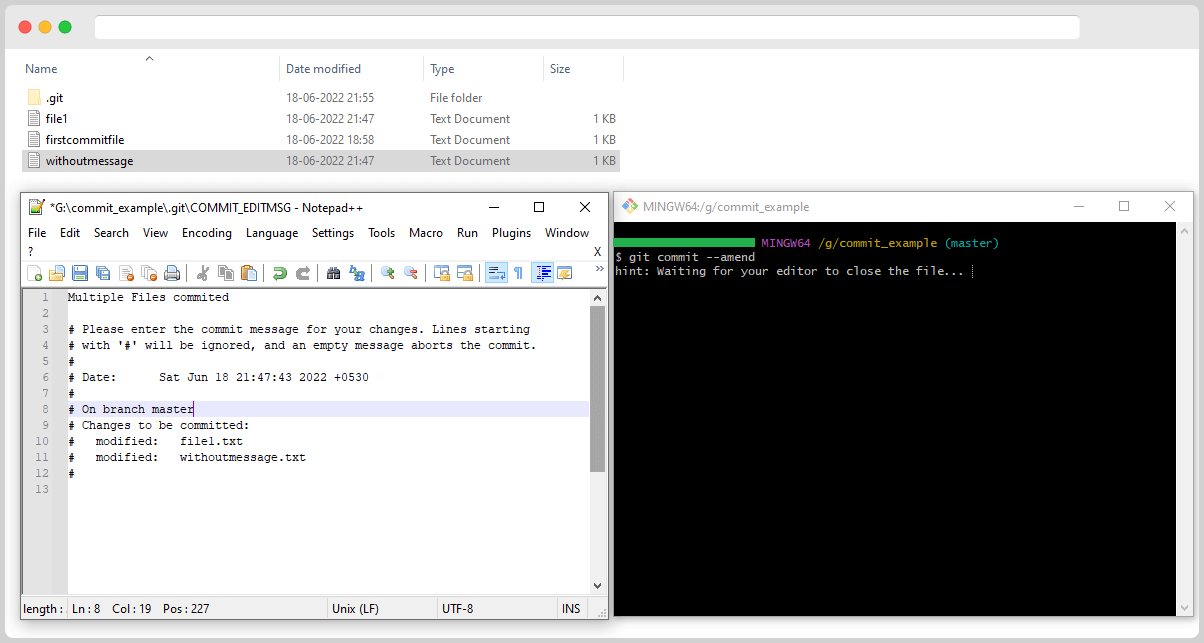
You can see that both files are now listed as modified. Just edit the message to your liking, save the file, and close the editor. Git will take care of the rest.
