So far, we’ve learned the basics of branches and how to create them on our local and remote repositories. We’ve also tried a few operations with them, like deleting and checking out branches. The next step is learning how to merge a branch into the main branch (or any other branch) to show that the feature addition was successful and ready for release. After that, we can delete the branch.
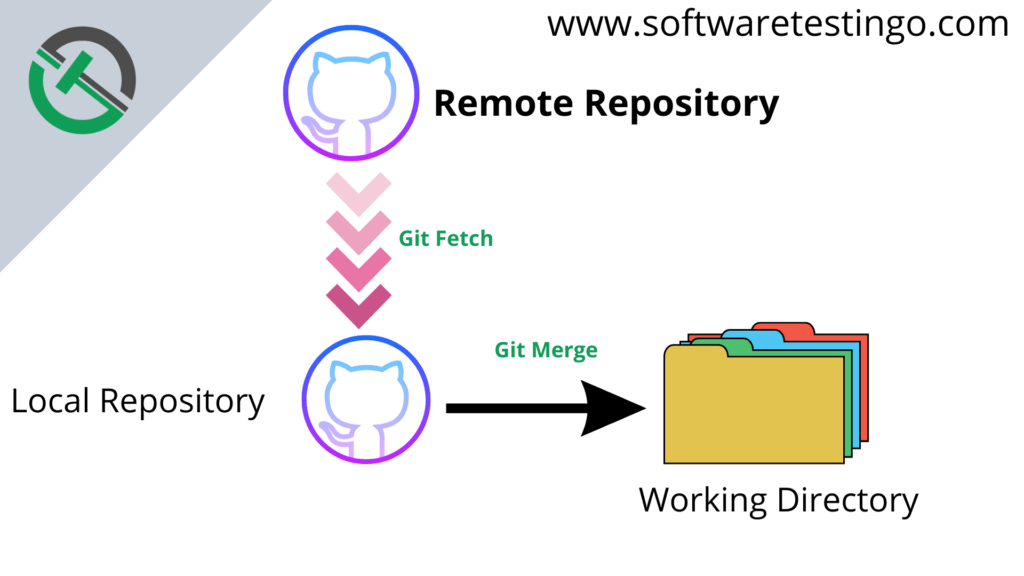
The Git merge command is the final step in incorporating changes from a remote repository. Once you’ve decided to accept the changes you saw using the Git fetch command, you can use the merge command to add those changes to your local repository. As the name suggests, this action “merges” the new code with your existing code base.
Why Do We Merge in Git?
We create Branches to work separately on a feature without disturbing the main stable branch, also known as the main branch. We do this because we want these features to be completed and tested before they are added to the software. Creating a separate branch allows us to develop the feature without affecting or destabilizing the main code base.
Once we finish working on a particular feature, we merge it into the Main Branch. This signifies that our work on that particular feature is complete and ready to become part of active development.
How to use Git Merge Command?
We can get the changes made on the remote repository by using the fetch command, and if we approve that, the changes can merge with our local repository.
Execute the following command to merge the changes we fetched in the previous section.
git merge

If you follow the same steps above, you can successfully merge changes into your local repository. The third line in the image below shows that the merge was done using a “fast-forward” technique employed by Git.
Before understanding Fast-Forward Merge In Git, we must understand how the Git merge works.
How Git Merge Works
Git merge is a powerful tool that can combine multiple sequences of commits into one unified history. In most cases, git merge is used to combine two branches. The examples in this document will focus on this branch merging pattern.
When using Git merge, you specify two commit pointers; usually, the branch tips and Git will find a joint base commit between them. Once Git finds a common base commit, it will create a new “merge commit” that combines the changes of each queued merge commit sequence.
If you have a new branch feature that is based on the main branch, and you want to merge this feature branch into the main branch, here’s what you need to do:
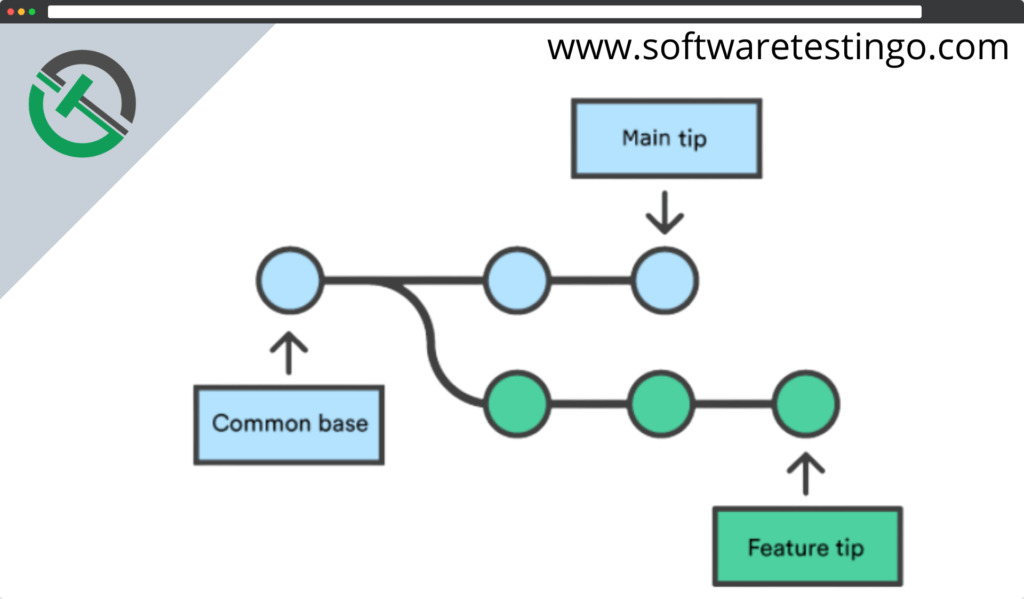
Invoking the git merge command will merge the specified branch feature into the current branch, and we’ll assume the main. Git uses different algorithms to automatically determine how to handle merging, depending on the situation.
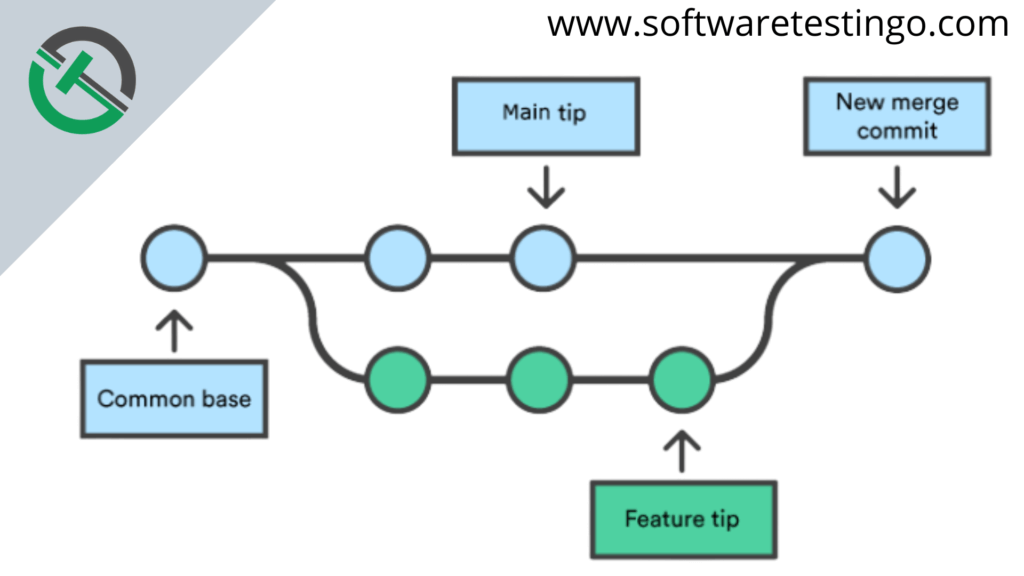
Merge commits differ from other types of commits because they have two parent commits. When creating a merge commit, Git automatically tries to merge the separate histories. However, if Git encounters data that has been changed in both histories, it won’t be able to combine them automatically. This is a version control conflict, and Git will need you to resolve it before continuing.
Git Merge Types
After you finish making changes to a branch, it’s time to merge those changes into the main branch. Merging takes the branch changes and integrates them into the main branch.
When we start merging branches, Git will take the commit history into account and perform a fast-forward or three-way merge. Let’s try to understand fast-forward and three-way mergers based on the branches and commit history using the following diagram.
Two different types of Git merge:
- Fast-Forward Merge In Git
- 3-way merge
Fast-Forward Merge In Git
To do a fast-forward merge, ensure there is a linear path from the branch you are diverting from to the branch you are merging. This means there has been no commit to the main branch since your feature branch diverted at the point of merge.
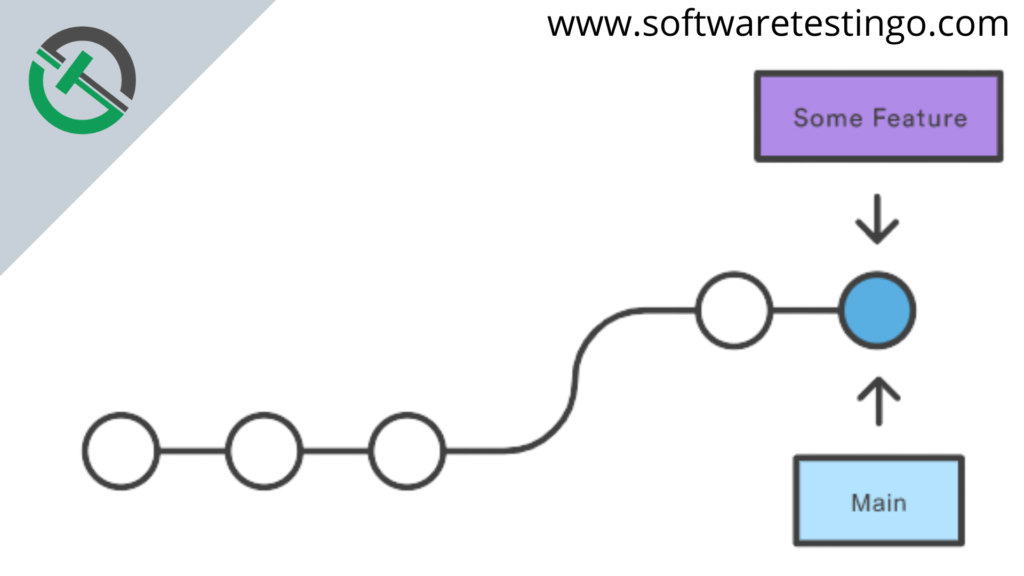
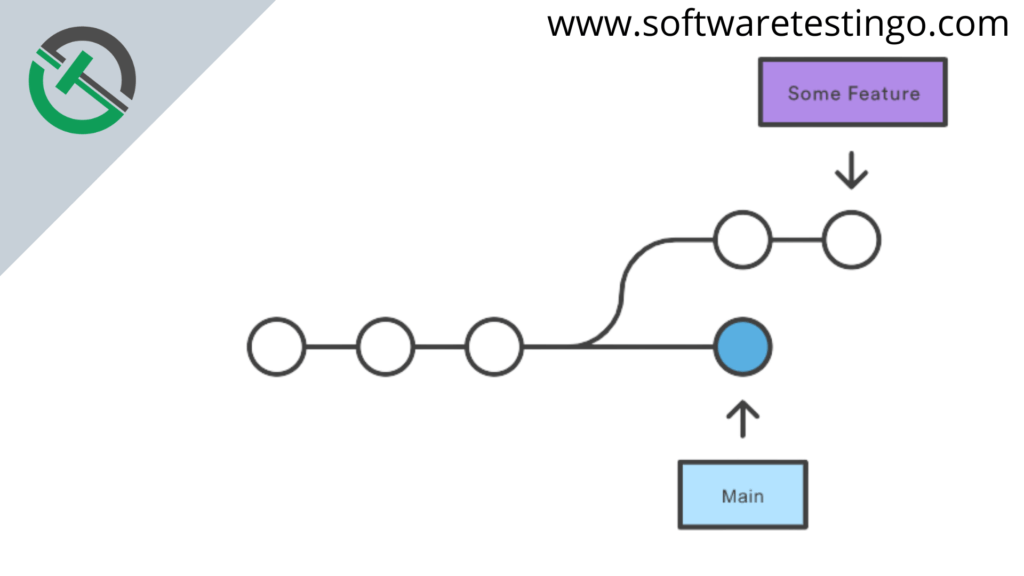
Example: A fast-forward merge of some-feature into the main would look something like the following:
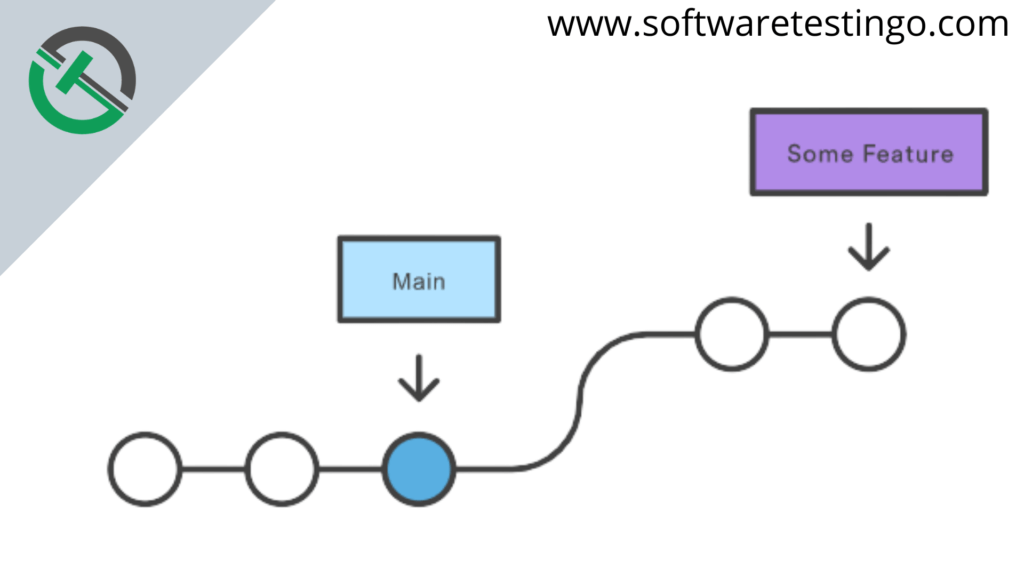
The image above demonstrates that the branch was successfully diverted and made two commits. At this time, there were no new commits in the main branch. After completing the two commits, we merge the feature branch into the main branch. This will result in a fast-forward commit on your part.
However, a fast-forward merge is not possible if the branches have diverged. When there is not a linear path to the target branch, Git has no choice but to combine them by creating a new commit that incorporates changes from both branches.
Let us take another example and also let’s try to understand Graphically fast-forward merge:
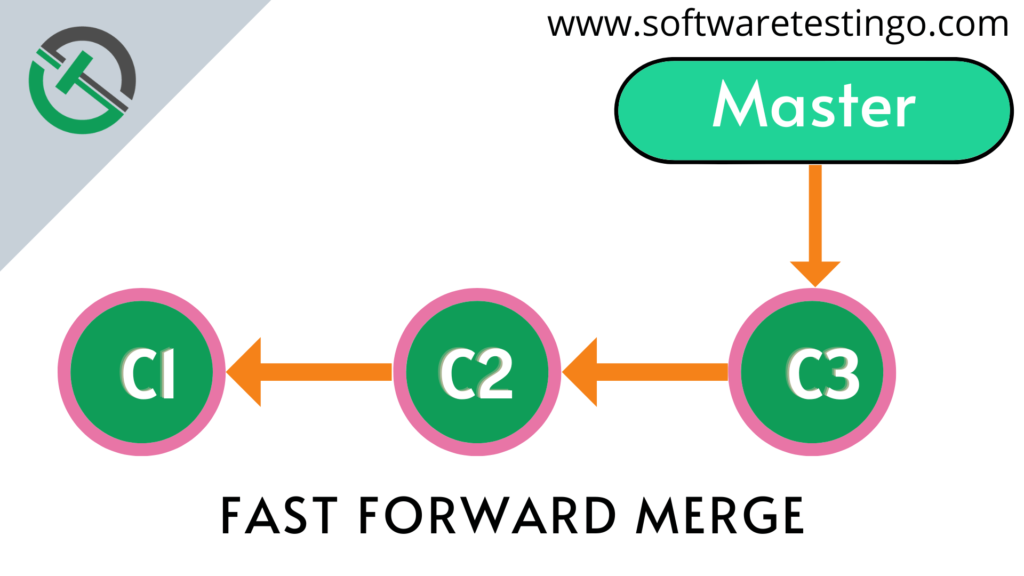
Suppose our main branch has three commits
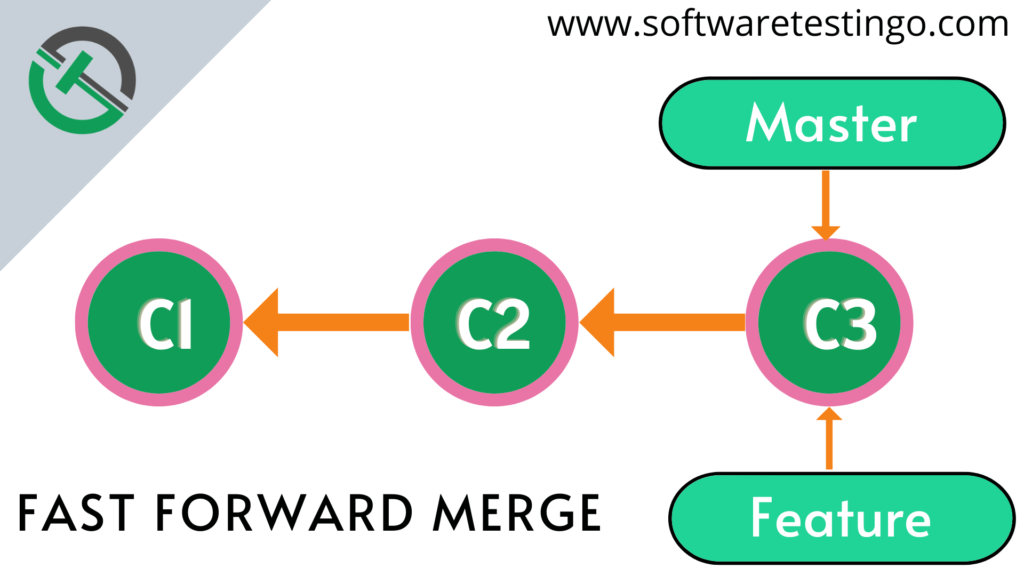
After that, let us create another branch called the new feature. So now, both main and feature branches are pointing to the same commit.
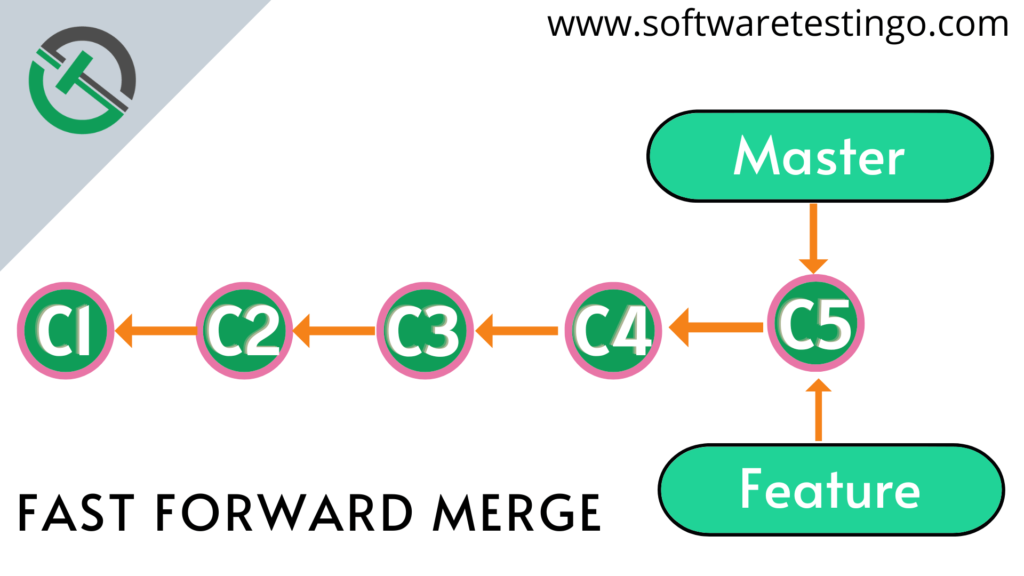
Let’s switch to the feature branch and make a few commits. We’ll need to bring these changes over to the main branch. There’s a linear path from our feature branch back to the master.
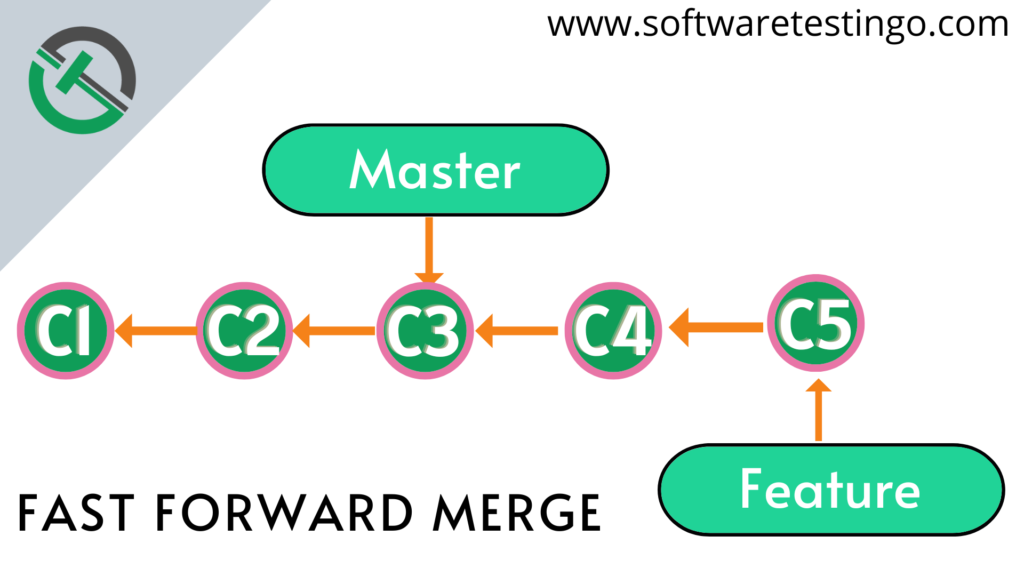
To merge the changes to the main branch, all you have to do is change the pointer of the master forward. This is called a fast-forward merge.
git init
echo hello>hello.txt
git add .
git commit -m 'first'
echo hello>>hello.txt
git add .
git commit -m 'second'
echo hello>>hello.txt
git commit -m 'third'
git add .
git commit -m 'third'
git branch feature
git switch feature
echo world>>hello.txt
git add .
git commit -m 'world1'
echo world>>hello.txt
git add .
git commit -m 'world2'
git switch master
git merge feature
git merge feature
3-Way merge
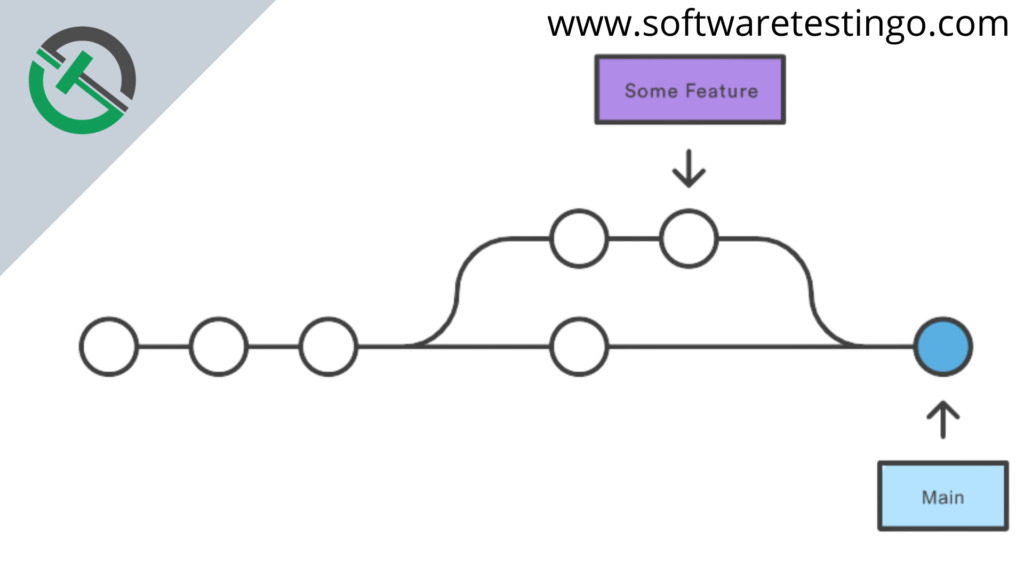
If a feature is taking a long time to develop or if several developers are working on the project simultaneously, it is common for new commits to appear on the main branch in the meantime. That time to merge, we need a 3-way merge.
A 3-way merge is a type of merge that uses a dedicated commit to tie together the two histories. The term comes from the fact that Git uses three different commits to create the final merge commit: the two branch tips and their common ancestor.
Many developers like to use fast-forward merges if you have a small change or bug fix. This means the new commit is added to the previous one. However, if you have a long-running feature, it’s better to use a 3-way merge. This creates a new commit that includes changes from both branches and is the new baseline for future development.
Let us try to understand by taking some simple examples. Suppose there are two branches master and future. But the future branch has two commits ahead of the Master branch.
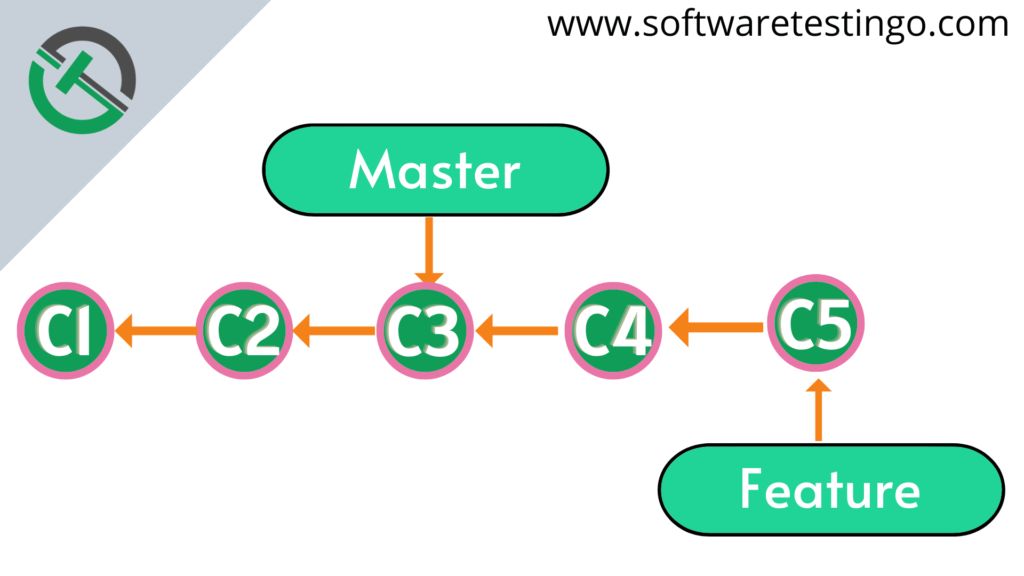
But after this point, another new commit happens in the master branch. So now it looks something like the below:
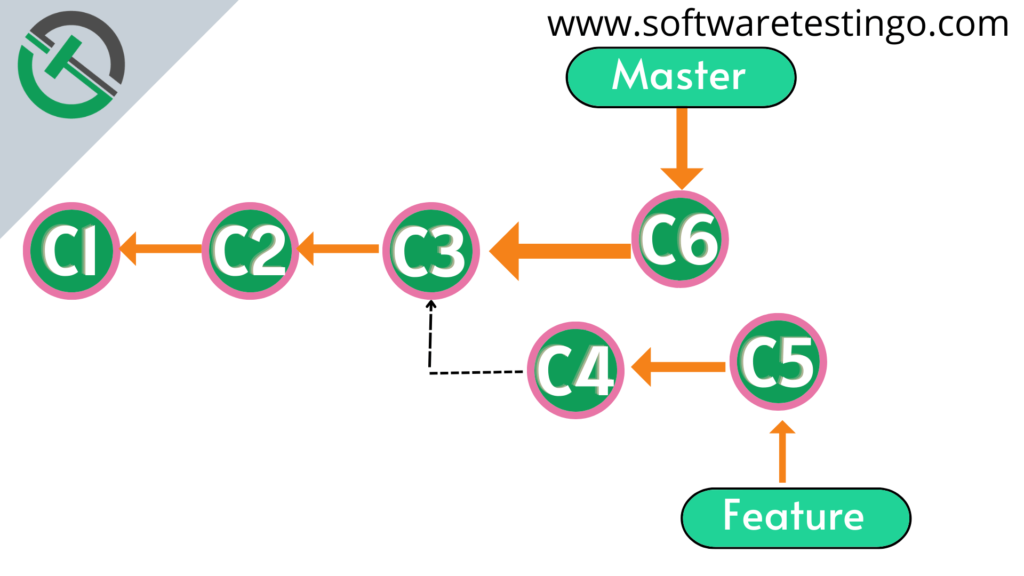
This means there are changes in the Master branch that are absent in the Feature branch. If we try to merge these branches, Git cannot move the master pointer toward the Feature branch. So, if Git switches the pointer towards the future branch, the changes in the master branch will be lost.
How do you merge two branches if they have diverged?
When two branches diverge, and we want to merge them back together, Git creates a new commit (a Merge Commit) that combines the changes from both branches.
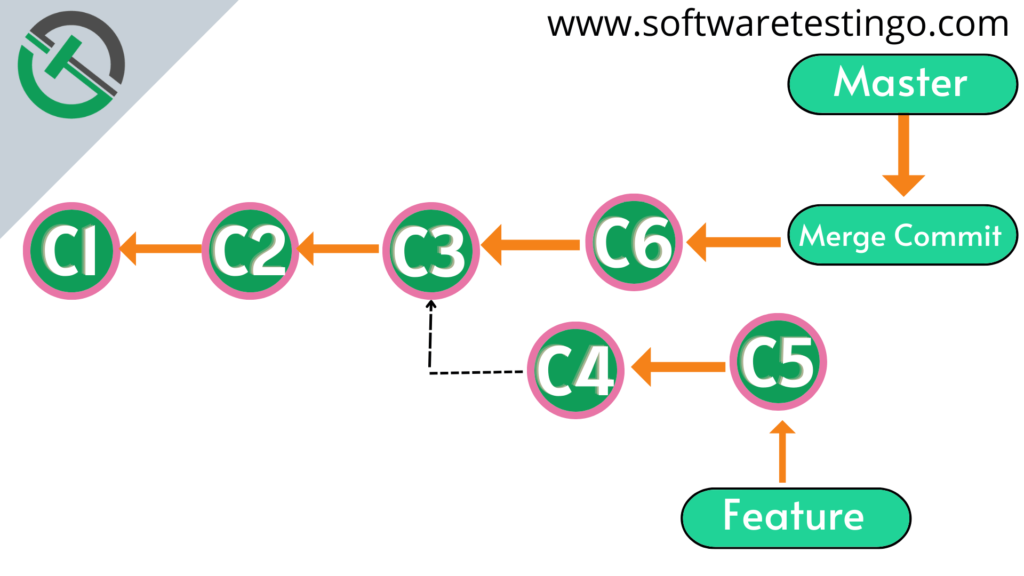
Now We will Understand how this merge happens Step by Step.
- First, Git will try to find out the commit from where the branches have diverged.
- Tip of the master branch means the last commit happened in the master branch.
- Tip of the future branch which means the last commit happened in the future branch.
Before merging the changes, Git looks at the 3 snapshots, which are before snapshots, after snapshots, and the base file or the common ancestor with which these two files will be compared. Based on these snapshots, Git will create a new commit by combining the changes. That commit is called a Merge commit.
git init
echo one>1.txt
git add .
git commit -m 'c1'
echo two>2.txt
git add .
git commit -m 'c2'
echo three>3.txt
git add .
git commit -m 'C3'
git branch feature
git switch feature
echo four>4.txt
git add .
git commit -m 'c4'
echo five>5.txt
git add .
git commit -m 'c5'
git switch master
six>6.txt
git add .
git commit -m 'c6'
git merge feature
git log --oneline --all --graph
Merging Branches in a Local Repository
To merge branches locally, first, we have to switch to the branch you want to merge into using the git checkout command(suppose you want to merge a feature branch into the master branch, then you have to switch to the master branch). This is typically the main branch. Then, use git merge and specify the name of the other branch that you want to bring into this one. In this example, we are merging the feature branch into the main branch. Note that this will be a fast-forward merge.
git checkout main
git merge feature
Merging Branches to Remote Repository
When you create a branch in your local repository, the remote repository isn’t aware of it yet. To push the branch code to the remote repository, set the upstream branch using git push. This command sets the upstream branch and pushes your changes to the remote repository at the same time.
git push –set-upstream origin <branch name>
Options In Git Merge
–no-ff Option in Git Merge
The –no-ff option prevents Git from merging the changes in the most efficient way possible.
git merge –no-ff

–no-commit Option In Git Merge
If you use the no-commit option when merging, Git won’t automatically commit the merge. This means that you’ll have to confirm the merge before it’s completed.
git merge –no-commit

